Installation Guide for EI60 25MM Fire-Resistant Insulating Glass
Installation Guide for EI60 25MM Fire-Resistant Insulating Glass
Disclaimer: This guide provides general instructions. The installation of fire-rated glazing must be carried out by qualified and experienced professionals in strict compliance with the approved fire-rated system design, local building codes, and national safety regulations. Improper installation will void the product's fire rating and may lead to catastrophic failure in a fire.

1. Pre-Installation Checklist & Safety
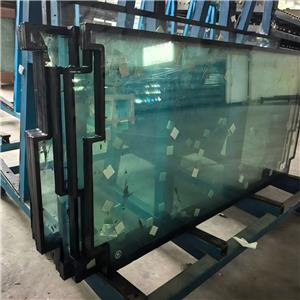
Inspection: Carefully inspect each glass panel upon delivery. Do not install any unit that is chipped, cracked, or shows signs of damage.
Handling: Always handle glass with care. Use appropriate suction lifters designed for the size and weight of the panel. Wear cut-resistant gloves and safety glasses at all times.
Storage: Store glass panels vertically (at a slight angle) on wooden A-frames in a clean, dry, and sheltered area. Avoid contact with moisture or direct sunlight.

2. Critical Preparation of the Opening
The supporting frame (steel, timber, or aluminum) is a critical part of the fire-rated system.
Approved System: The frame and all fixings (fire-rated bolts, screws) must be certified for a minimum 60-minute (EI60) fire resistance and be compatible with the glass.
Structural Integrity: The surrounding wall or structure must have the same or higher fire rating than the glazing system (e.g., EI60, EI90).
Opening Dimensions: The opening must be square, plumb, and level. The clearance between the glass edge and the frame must be precisely as specified in the system's test report (typically 3-5mm per side).
Cleanliness: The frame channel must be perfectly clean and free of dust, debris, or oils before installation.
3. Step-by-Step Installation Procedure
Step 1: Position the Glass
Carefully lift the glass panel and place it into the prepared opening. Use non-combustible setting blocks (e.g., mineral wool, certified plastic blocks) at the bottom corners to support the glass weight and maintain the correct clearance. Do not allow the glass to directly contact the metal frame.
Step 2: Secure the Glass in the Frame
Follow the certified system's instructions for securing the glass. This typically involves placing the front bead/coving into position.
Use only the specified fire-rated screws or bolts at the recommended centers (spacing) to fix the bead to the main frame. Do not overtighten, as this can stress the glass.
Step 3: Apply the Fire-Rated Sealant (Most Critical Step)
The sealant is the primary barrier against smoke and flames. It must be a certified, flexible, intumescent fire-rated sealant.
Joint Preparation: Ensure the perimeter joint is clean, dry, and free of contaminants.
Application: Using a sealant gun, apply a continuous, uninterrupted bead of the intumescent sealant to fill the perimeter gap between the glass and the frame, and between the bead and the frame.
Tooling: Immediately tool the sealant with a suitable tool to create a smooth, concave finish that ensures excellent adhesion to both surfaces. This sealant expands when heated to seal gaps created by the fire.
Step 4: Apply the Silicone Sealant (Secondary Seal)
After the intumescent sealant has fully cured (refer to manufacturer's instructions), apply a continuous bead of high-quality, neutral-cure silicone sealant to the interior and exterior perimeters.
This silicone seal provides weatherproofing, acoustic damping, and a clean aesthetic finish. It must be compatible with the intumescent sealant.
4. Post-Installation Verification
Clear Labelling: After installation, affix a permanent, legible label to the frame or glass (as per local regulations) stating the fire rating (e.g., "EI60"), the standard (EN 13501-2), the manufacturer's name, and the installer's details.
Final Inspection: Check that the glass is not under stress, all fixings are secure, and the sealant application is smooth and complete with no gaps.

WARNING:
NEVER use standard silicone or non-intumescent acrylic sealants as the primary seal. They will not provide fire resistance.
NEVER drill, cut, or modify the glass or the frame after installation.
The performance of the entire fire-rated assembly depends on the correct installation of every component.